
Part 2: Configuring the Raspberry Pi
This is a continuation of Part 1 of Controlling home devices with Bluemix Internet Of Things If you haven’t read Part 1, please do that first…
In Part 1 we got the electrical work out of the way. We wired up the relay’s and connected the circuit’s. In this part of the 3 part series we will configure the Raspberry Pi to control the relay’s that we wired up in part 1.
So without delay let’s jump into the next part.
Install software on the Raspberry Pi
The first step of getting your Raspberry Pi setup is installing Raspbian. If you have the Canakit its pretty easy, just plug in the wifi dongle and insert the SD card and plug in power. If you don’t have the Canakit follow the instructions from here. Once you get Raspbian installed open up a terminal.
Next, we will need to update Raspbian to the latest. To do this run the following.
| |
Next, we will need to download LightShowPi. LightShowPi is the foundation for syncing the lights to the music.
| |
Next, we need to install LightShowPi, run the following. Please not the install step will take some time, be patient…
| |
Once the install is complete we need to reboot the Raspberry Pi to pickup some new environment variables. To reboot run the following.
| |
Wire up the Raspberry Pi’s breadboard
Once we have rebooted we need to connect the bread board to the Raspberry Pi and connect the bread board to the relays. This took some tinkering to figure out the GPIO ports but below I have posted a picture of mybread board on how it was constructed. For me I set everything up with 8 channels first and using LED’s provided in the Canakit to make sure everything was working then I moved over to the real relays. So let’s do that.
I would highly recommend following the steps in this page on getting your bread board working.
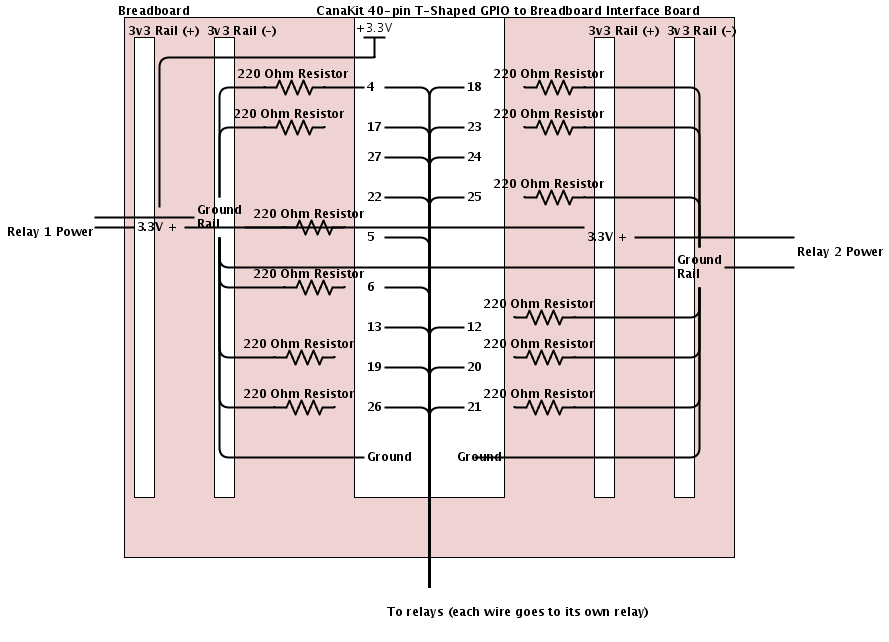
Below is a picture of my finished bread board with 16 channels. I have included a wiring diagram as well. Basically each GPIO port goes to the input side of the relay controller. If you notice I have a couple left over LED’s on the bread board, this was done via the tutorial list above.
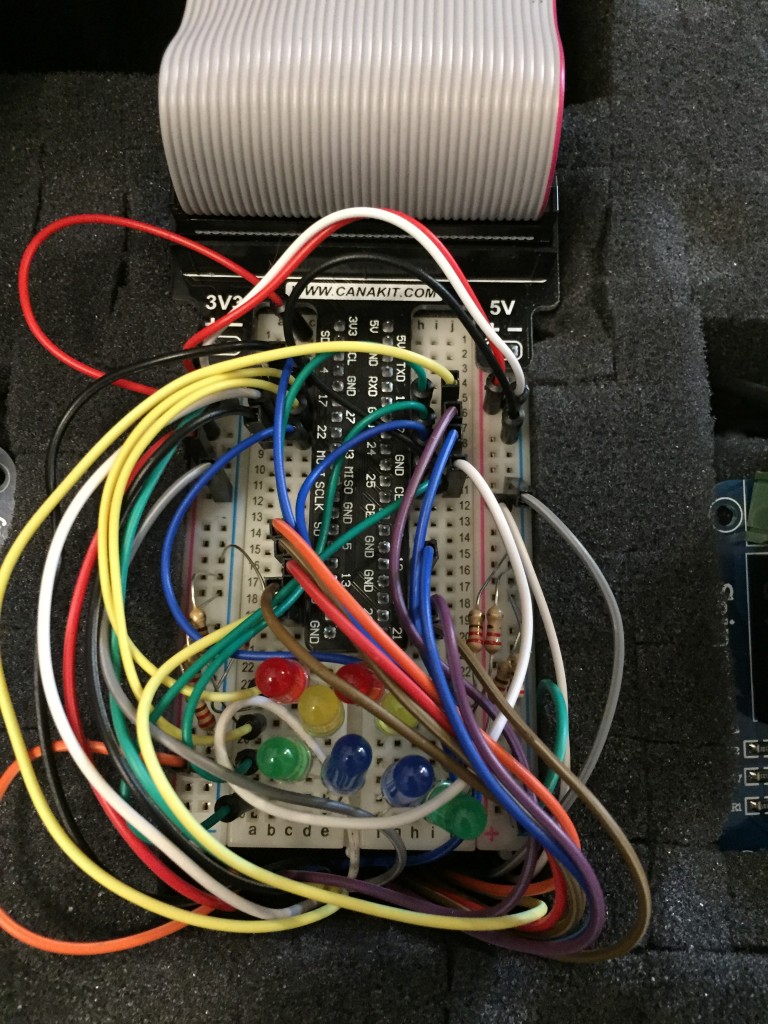
What is going on above is each of the delays is plugged into a GPIO port and then plugged into the ground rail and connected by a resistor. The particular resistor I am using is a 220 Ohm resistor.
So let’s test some things out. Let’s play a pre-loaded song.
| |
All the relays should be flashing. At this point you can plug the lights into the outlets as well. If you notice the lights go on solid for 30 seconds before the songs play, we can override this. Additionally this file has the GPIO pins mapping as well. This mapping is for using the full 16 channels, if you are using less just remove some of the mappings from the end of the gpio_pins line. To do this we need to place a config file in our home directory.
| |
Choose your favorite text editor and put the following contents in the file. We change the time it waits from 30 seconds to 1.
| |
That is it for this part. In the next part of this series we will configure the Bluemix app to respond to text message votes and then the app to interface with the python code that controls the lights.